
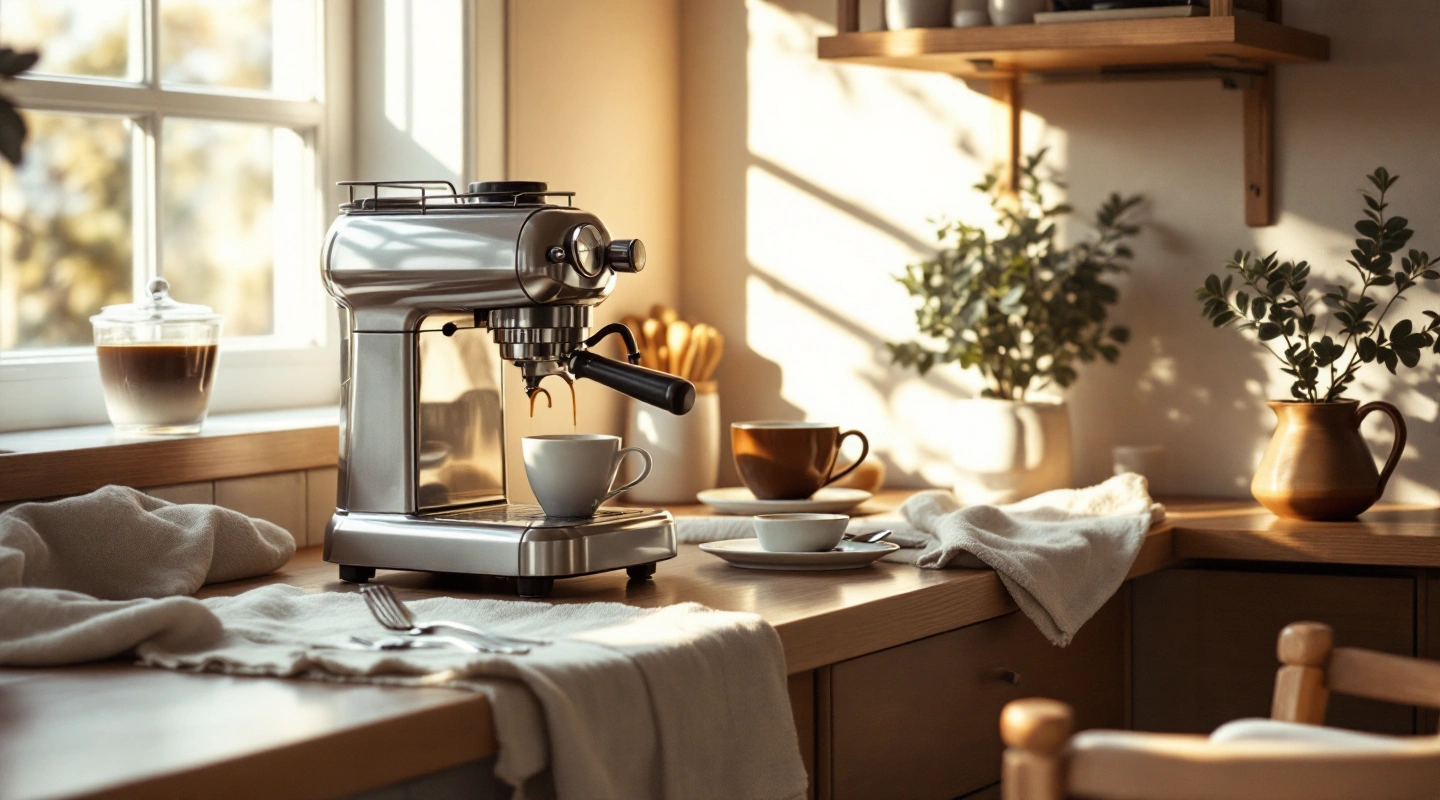
The best espresso machine for beginners depends on the task you want help with. Start with the Bambino for clear basket choices and milk work by hand. The Stilosa suits learning to stop coffee with a dial. Choose the Maestro Plus for automatic milk settings. All three leave coffee preparation and care in your routine.
Keep a repeatable shot with the dose and yield calculator. The espresso statistics and running-cost data can help with the budget around the machine.
#1. Breville Bambino BES450
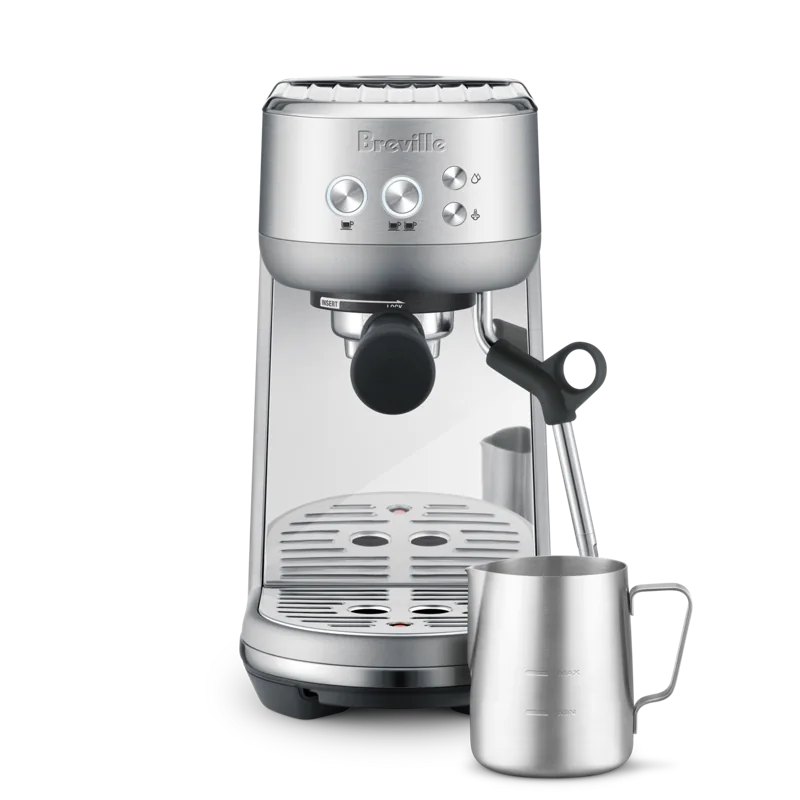
Breville Bambino BES450 Breville Bambino BES450
Our verdict:
For manual milk work
Choose the BES450 for its manual milk process and separate coffee preparation. Follow the supplied basket route before adding tools.
Keep in mind: It has no automatic milk heat or texture settings. Whole beans need a suitable separate grinder.
New US offer below $500 before tax and shipping; checked 31 October 2026.
View at BrevilleThe standard Bambino is a useful first choice for someone who wants to learn coffee and milk as separate skills. Its US book lists single-wall and dual-wall baskets. It directs fresh grounds to the single-wall route and pre-ground coffee to the dual-wall route. That gives you a clear starting choice based on the coffee you plan to use, rather than a vague promise that every basket works the same way.
The documented kit includes a tamper and milk jug. Begin with those tools and the supported route. You can learn what each part does before deciding whether anything needs to change. Whole beans still need a suitable separate grinder. The machine does not do that stage for you, so a bean plan needs to include the grinder from the start.
Milk work is manual on the BES450. You handle the jug and wand position as the book directs. This can suit a buyer who wants to learn steaming as part of the process. It can be the wrong choice if your main wish is to select milk heat and texture and let the machine handle that stage. Those automatic settings do not belong to the standard model.
The supplied 54 mm portafilter is part of this exact system. That number is not a universal fit rule for other handles or baskets. Start with the stock kit. If you later want a different part, check the locking shape and available space as well as the nominal size. A beginner does not need to settle every future upgrade before making the first coffee.
Choose the Bambino if you want a clear coffee path and plan to learn milk work by hand. Start with the basket that matches the coffee you will use, then learn its preparation with the supplied tools. If you would rather get help with milk settings, compare the Maestro Plus before buying. A useful first machine should fit the work you want to do.
#2. DeLonghi Stilosa EC260BK
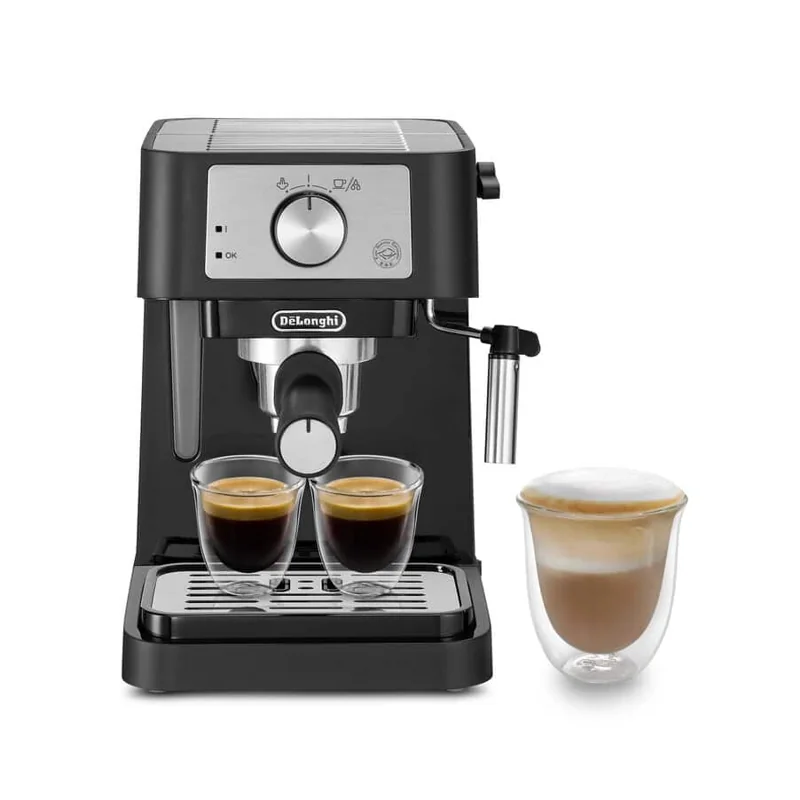
DeLonghi Stilosa EC260BK DeLonghi Stilosa EC260BK
Our verdict:
For manual coffee
Choose the Stilosa for its documented manual coffee and milk routine. Plan the basket route and required extras before buying.
Keep in mind: It needs a cooling step after steam before coffee. Whole beans need a suitable separate grinder.
New US offer below $500 before tax and shipping; checked 31 October 2026.
View at De’LonghiThe Stilosa is for the learner who wants direct control of the coffee stop. You watch delivery and return the selector to ON when the desired amount has been made. This is a step to learn and repeat. It is not a preset shot button. Someone who wants to stay with the cup may value that direct action more than someone who wants a saved stop.
Its EC235/260 instruction book shows the handle, spoon/tamper and one-shot and two-shot filters. The one-shot filter has an ESE paper-pod route. Match each filter with its stated coffee use. Do not force a hard capsule into a paper-pod route or assume a different filter uses the same preparation. The exact diagrams are a useful starting reference.
For hot milk, the user handles the jug and steam dial. After frothing, the book calls for cooling the boiler before coffee is made again. Learning the full return is part of learning the machine. If your usual order has several mixed drinks, read that sequence before buying. A simple dial still has more than one state to understand.
Care includes the cappuccino maker and nozzle as well as the coffee parts. Follow the removal and cleaning steps after use. This is a better choice for someone who accepts that hands-on routine than for someone who wants to leave the station as soon as the drink is poured. The appeal of direct controls should include a willingness to handle the rest of the work.
Choose the Stilosa when learning the manual stop is part of what you want. Do not choose it on the assumption that fewer buttons remove every learning task. Coffee preparation and milk handling still need practice. Cooling and care also remain part of the routine. The right first machine is one whose stock routine you want to use.
#3. DeLonghi Dedica Maestro Plus EC950M
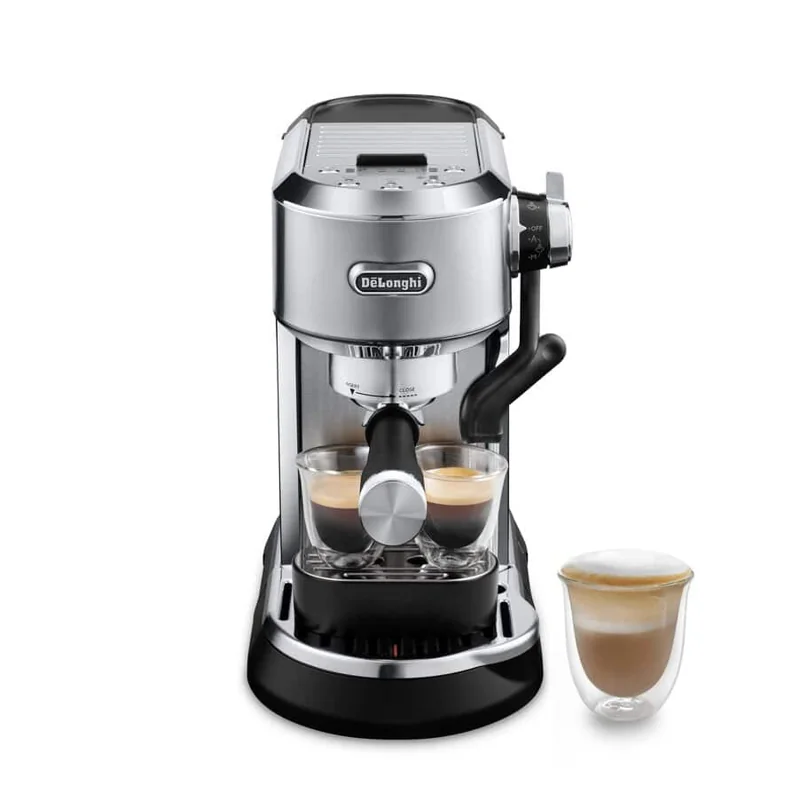
DeLonghi Dedica Maestro Plus EC950M DeLonghi Dedica Maestro Plus EC950M
Our verdict:
For automatic milk
Choose it for automatic milk help with a manual option. Coffee preparation and cleanup stay in the routine.
Keep in mind: Automatic milk controls do not apply in manual mode. Whole beans need a separate grinder.
New US offer below $500 before tax and shipping; checked 31 October 2026.
View at De’LonghiThe Maestro Plus is the choice here for a learner who wants help with the milk stage. Its automatic steam route uses wand position A and offers milk temperature and texture settings. You still prepare the milk vessel and coffee. This is assistance with one stage, rather than a system that grinds beans, fills the filter and serves the whole drink without your input.
There is also a manual steam route at position M. The automatic milk settings cannot be selected for that manual function. Keep those modes separate when choosing the machine. Automatic mode can be the starting route you want now, while manual mode offers a different user role. Do not assume that the same controls apply in both modes.
The US EC950 book lists single-wall and double-wall baskets for one-cup and two-cup preparation. It includes a tamper and a milk jug. A scoop and cleaning tools are listed too. Three infusion-temperature choices give the user another coffee control to learn. Change one setting at a time rather than expecting the list of features to supply a recipe.
Milk care remains necessary. The book directs wiping the wand and moving it to OFF for automatic rinsing. A rinse does not replace the wipe. Dishwasher permission is given for the drip tray and milk jug, plus the small cup tray. Use the exact part list before treating another removable item the same way.
Choose the Maestro Plus if milk assistance addresses the part you most want help with. The trade-off is that more settings still need clear use, and coffee work remains yours. Whole beans need a separate grinder. Treat it as a supported way to share the milk task with the machine, rather than a promise to avoid learning the rest of espresso preparation.
Best espresso machine for beginners: choose a starting route
Write down the drink you want most mornings. It might be straight espresso, an Americano, a hot latte or coffee with cold milk. This simple choice helps you weigh the features. A milk setting can be central for one buyer and almost unused by another. Do not let a long list of possible drinks take attention away from the one you will actually make.
Then decide what coffee you want to buy. Pre-ground coffee and whole beans are different plans. So is a supported ESE paper pod.
Choose one route for the start. You can change later, but the first equipment list needs a clear basis. Buying a machine while leaving the coffee format undecided makes it hard to judge whether the starting kit is complete.
Next name the skill you want to learn. Perhaps you want to adjust freshly ground coffee, practice milk work or take direct charge of the coffee stop. There is no need to learn every skill at once. The right machine can let you focus on one part while using a supported route for the others. Choose that focus before comparing optional accessories.
Finally, name the task you would rather hand over. If it is milk heat and texture, the Maestro Plus is the relevant candidate. If you want a direct dial stop, the Stilosa is relevant for the opposite reason: it leaves that action with you. The Bambino offers a clear basket choice while keeping milk manual. The word beginner does not describe one shared preference.
Learn the path from coffee to cup
An espresso routine has several stages. Coffee must be ready for the chosen filter. The filter needs to be filled and fitted as directed.
The machine then delivers water through the coffee. Milk or added water may be a later stage. The used parts need care. Seeing these jobs as separate makes it easier to understand what a feature actually changes.
A coffee button concerns the delivery stage. An automatic milk mode concerns the milk stage. Neither means that coffee appears in the basket by itself. A grinder would handle another part of the process, but these three stock machines do not have one built in. Count the work you still do, rather than treating a single automated step as the whole drink.
The filter sits in the portafilter, which is the handle you fit to the machine. You do not need to buy a different handle to understand that role. Learn the supplied parts and the way the book tells you to fill and lock them. Keep the operating sequence tied to the exact model. A familiar-looking handle on a video may use a different fitting process.
Use the semi automatic espresso machine guide if you want more context for this division of work. The useful question is which stages you want to manage yourself. It is clearer than asking whether a machine is automatic in a broad sense. Coffee, milk and grinding can each have different levels of user input.
Pick the basket before choosing grinder settings
The basket is the filter that holds the coffee. Its route helps determine what preparation you need. On the Bambino, the US manual directs freshly ground coffee to single-wall baskets and pre-ground coffee to dual-wall baskets. Use that instruction to make the first coffee choice clear. Do not treat the wall types as decorative variants.
The Maestro Plus also has documented single-wall and double-wall choices. Read its exact directions for selecting and preparing them. A filter choice on one machine should not be used as a substitute for another model's book. For the Stilosa, use the one-shot, two-shot and ESE route diagrams rather than assume every term from another brand maps directly to its parts.
If you start with pre-ground coffee, choose the supported route and learn that preparation. You can buy a suitable grinder later if your goals change. That future option does not mean you must begin with every tool. It does mean that moving to another basket deserves a fresh look at the equipment and recipe. Keep the new route separate from the old one.
If you start with beans, select a grinder for the intended espresso use. The model and adjustment process matter more than a broad label such as coffee grinder. A grinder you already own needs the same check. Do not assume its ability to grind for another method settles how it will serve this basket. Read both equipment guides before adopting a starting routine.
Keep a simple record of your preparation
Keep enough detail in a note to repeat what you did. Start with the coffee and the basket you used. Add the control settings and any measurements that matter to your recipe. A short record of those choices is easier to follow than a long row of numbers that leaves out the coffee or basket.
Make one deliberate change at a time when learning the effect. If you change the coffee and filter while also changing the grind and delivery setting, the next result cannot show which change mattered. Keep the starting route steady while you learn. This is a way to make your own observations clearer, rather than a claim that one fixed recipe suits all three machines.
Grinder numbers are local to the grinder and coffee. A number from another person's equipment is not a universal starting point. Likewise, a coffee button name does not tell you the dry coffee weight in the basket. Keep those choices distinct. If you use a scale, check that the scale and cup fit together in the permitted brewing arrangement.
Write down changes to a shared machine where the next user can find them. A changed preset can surprise someone who expects the old routine. A note should describe the action, rather than call the result perfect for everyone. Different people can want different drinks while still sharing a clear process for operating and caring for the machine.
Decide how much milk help you want
Manual milk work is a skill in its own right. You need to fill a suitable vessel, position it with the milk device and follow the steam sequence. The Bambino and Stilosa leave that stage with you. Their equipment differs, so use each book's method. A technique shown with one wand is not a reason to copy every position or control action to another.
Automatic milk help changes who handles some decisions during steaming. On the Maestro Plus, mode A offers milk temperature and texture choices. The user still sets up the vessel and handles the drink. This can suit someone whose main goal is less involvement during milk heating. It does not remove the need to learn how the jug, wand and selected mode work together.
Mode M is a different process on that machine. You take the manual role, and the automatic heat and texture settings do not apply. Read the EC950 US book for those mode boundaries. They matter more to a new owner than a broad statement that the machine has both manual and automatic steam.
Think about your preferred result as a learning goal, rather than an included feature. A milk setting is a control choice, not a measured foam result for every milk. A manual wand gives you work to learn, not a promise of instant latte art. Read the supported milk modes beside the kit list. Choose the type of help that makes you more willing to use the machine.
The milk-frother guide compares the separate coffee and milk tasks. Keep the rest of the work in view there too. A buyer can value milk help and still prefer to prepare coffee by hand. Automation does not have to cover every stage to be useful.
Cold milk drinks can simplify the starting choice
If your usual drink combines espresso with cold milk and ice, you do not need to steam that milk first. The main machine task is the coffee stage. That can help you choose what to learn at the start. You can focus on a supported coffee route and add hot milk work later if the household wants those drinks too.
This is a serving method, rather than a cold-brewing mode. The espresso is brewed before the cold ingredients are added outside the machine. A cold finished glass does not establish cold extraction. Keep the coffee process and final drink assembly separate in your plan. There is no need to seek an unproved iced program for a task that takes place on the counter.
The final glass also does not always need to fit beneath the coffee spouts. A suitable brewing cup can receive the coffee before you combine the drink. Check vessel stability and handling, as well as any scale you use. A tall glass in a product scene does not prove clearance for your own equipment. Work through the actual serving route.
If cold milk drinks dominate your order, assess coffee preparation and serving before paying for milk automation. Milk automation may still matter to someone else in the home, but assess that as a second need. It need not decide the first machine on its own.
Learn the change from milk back to coffee
The end of a milk task is not always the start of the next coffee task. The Stilosa book calls for cooling the boiler after frothing before making coffee again. That is an operating step to understand in advance. A person who learns only how to start steam has learned half of the mode change. The return matters in a shared order.
Imagine the drinks you make together. One person might want hot milk while another wants espresso. Read how the exact book asks you to handle that order. Do not turn a light, a sound or a guessed wait into a shared ready rule for every machine. Indicators need to be understood in the state where they appear.
There is no timed comparison here of how quickly these machines switch or serve several people. A heating claim alone does not cover preparing coffee, setting up milk, changing modes and completing care. Think through the full sequence. If it sounds like more involvement than you want, that is a useful reason to adjust the machine choice before buying.
You can make a short household plan without inventing a service routine. Note the order of stages given in the instructions and who will do each task. Do not assume the machine brews and steams at once. The aim is to see whether the permitted sequence suits your home, rather than promise a cafe pace from a compact appliance.
Put required equipment ahead of optional upgrades
Begin with the exact packing list and the manual's parts diagram. Mark what is included. Then mark suitable equipment you already own.
Finally, list what is still required for the drink route. Keep optional tools on another line. This makes the missing essentials clear and prevents a long shopping list from looking like a complete plan when a grinder is still absent.
For whole beans, a suitable grinder is required. For manual milk, a suitable vessel is required. The Bambino and Maestro Plus books list milk jugs, but the exact offer still needs to match the intended kit. The Stilosa's combined spoon/tamper is a supplied preparation tool. Do not replace an included tool by default while ignoring something essential that is missing.
A grinder can be a later purchase if you begin with a supported coffee route that does not require it. It cannot be deferred from a plan that starts with whole beans and no way to grind them. Make that distinction explicit in your own list. A future hope is not working equipment on the first morning.
Unknown required costs leave a complete setup unsettled. They do not become zero to make the list appear finished. If the full route is beyond your planned spend, simplify the starting path or wait. A modest, complete route can be more useful than a feature-rich machine with a missing essential. Resolve the actual list before choosing accessories for appearance.
Choose tools by the problem they solve
A scale can help you record quantities if it fits the working setup. It does not choose a recipe for you. Check the cup and scale beneath the spouts together, then decide what you want to measure. A tool that cannot sit safely in the required position is not useful just because it appears on a generic beginner list.
A new tamper should match the actual basket and address a handling need. The stock tamper can be a starting tool while you learn. A heavier or more elaborate part does not establish a better cup by itself. Give the original kit a clear trial within the manual's routine before deciding what problem a replacement should solve.
A replacement basket needs fit and preparation checked. A replacement handle needs the correct locking shape and clearance. Nominal size alone cannot settle either question. A deeper basket may raise a space issue inside the handle even if its top appears to fit. Do not build an upgrade plan from a single number in a product title.
Keep internal modifications outside the starting purchase. Choose stock equipment for its documented use. If a machine lacks your main required control, choose another route that supplies it. A beginner should not need to rely on an imagined future change to make a new appliance meet the central goal. Learn the supported machine you are actually buying.
Give the station enough working space
Place the machine in the proposed position, using a labelled drawing or exact model reference for planning. Then add the preparation area. You need a stable spot for the handle while filling it, a cup route and space for the coffee. If you use a grinder, its body and working access belong in the layout too. The machine case is only one part of the station.
Check tank access beneath any cupboard. A unit that fits while closed may still be awkward to refill. Check tray removal and the route to the sink. A grinder or storage jar should not block a part that needs to come out after use. The equipment must fit while being used and cleaned, rather than only while arranged for a photo.
Milk work needs its own movement space. The jug should have room to reach the wand as directed and a clear resting place afterward. Storing it beside the machine says little about that working route. Avoid placing small tools where they will need to be moved each time you steam. Open counter space can be a useful part of a beginner setup.
Use the actual cup you intend to brew into when checking clearance. If a scale is part of your plan, check the pair. A tray option or a tall glass in an image does not prove fit. A separate brewing cup may suit a larger final drink. Decide that serving method before buying vessels around an assumed opening.
The model's market matters as well. Keep the exact US identity with the offer and manual. A family name can appear in more than one region. The right electrical version and instructions should be clear before use. Do not borrow a specification from an international sibling just because it has a similar name or finish.
Make care part of learning the drink
The end of brewing is followed by care for the parts used. Coffee and milk leave different residue, and scale is another task. The right cleaning method depends on the exact part. Learn these jobs with the operating sequence. A machine that seems simple while pouring can still ask for more care than the owner wants afterward.
The Maestro Plus's wand routine is a good example. Wiping residue and moving the wand to OFF for rinsing are distinct actions. One does not establish that the other has been completed. Automatic help with milk does not turn every surface into a self-cleaning part. Keep the full after-use process in view when weighing the convenience feature.
The Stilosa has its own cappuccino maker and nozzle cleaning steps. Follow the directed cooling and removal process. Keep small pieces in order and refit them as shown. Do not use another brand's disassembly method because a milk device looks similar. The exact book should be easy to find for whoever uses the station next.
Dishwasher permission needs the same care. On the Maestro Plus, the book names particular parts that can go in. That is not permission for the complete handle, every accessory or every removable component. Read the part list as written. Removable and dishwasher-safe answer different questions and should not be treated as the same label.
Descaling also needs its full model-specific procedure and approved materials. It is not a substitute for routine coffee and milk cleaning. A reminder being dismissed does not prove the job has been done. Put required care where it can be followed, and leave time to finish it before the next normal drink.
A first-week learning plan
Before the first normal coffee, complete the exact first-use and rinse directions. Identify the filters, controls and care tools. Choose one supported coffee route and set the unrelated parts aside. Read the whole sequence once before starting. This helps keep the first session focused on operating the machine, rather than stopping to guess which part comes next.
For the first coffee sessions, repeat the preparation rather than change every setting. Watch the controls and cues described in the book. Note what you used so you can return to it. There is no need to chase a perfect recipe before you can repeat the basic actions. A clear starting point is useful even when you plan to refine it later.
Next add the milk stage if it is part of your main drink. On the Bambino or Stilosa, follow the manual method. On the Maestro Plus, choose the intended mode and understand its settings. Learn the after-use routine in the same session. Treat making and caring for the drink equipment as one piece of practice.
Then make the usual shared order, if there is one, using the permitted mode sequence. Check whether tools and vessels are in the right places. The goal is to find awkward work in your own layout. It is not a timing contest. A different resting place for a jug may help more than a new accessory if the main problem is the station arrangement.
At the end of the week, identify one change that would matter. It might be a different coffee route, clearer notes or more working space. If you want a new tool, name the task it should improve. This keeps learning focused. It also helps you avoid blaming the machine for a process you have not yet made consistent enough to assess.
When a brew does not behave as expected
Begin by naming the stage where the issue occurs. Does the question concern the grinder, the coffee delivery, a milk mode or a care cycle? A broad description such as it does not work makes the exact troubleshooting guide harder to use. Record the control and cue you saw, along with the coffee route. Keep observation separate from a guessed cause.
Check the exact book before changing several things. A light can mean different states at different points in the process. The Stilosa's return from steam, for example, belongs to its mode sequence. It should not be treated as a reason to force the next coffee stage. Follow the stated process and use the maker's support route if the behavior remains unclear.
Do not open the appliance or attempt an internal repair based on a general video. User-removable care parts and internal service parts are different. The maker's directions define what the owner may do. A new machine should be assessed within supported operation. An unexplained symptom does not justify turning the first week into a repair project.
Keep your notes useful for support. The exact model, selected mode and observed behavior matter more than a claim that the coffee was simply wrong. If you changed a part, note that too. Clear facts can help distinguish an operating question from something requiring service, without pretending that a general buying guide can diagnose every fault.
Choosing for more than one person
Ask each user which task they want to do and which task they want help with. One may enjoy manual steaming while another wants milk settings. One may like the Stilosa's direct stop while another prefers a coffee-button routine. These are real use differences. A shared machine should be chosen around the overlap, rather than the most enthusiastic person's future upgrade plans.
Agree on how coffee and settings are left. If one user changes a basket or mode, the next user should be able to see that. A short note can be enough. Keep shared starting instructions close to the exact book, rather than inventing one procedure for all possible drinks. The stock controls should make sense to everyone who will rely on the machine.
Care responsibility belongs in that discussion too. An automatic milk feature will not settle who wipes the wand or empties the tray. Choose a handoff standard that follows the directions and leaves the machine ready for the next session. A machine that everyone can operate but nobody wants to clean is a poor household fit.
Finally, keep the main drink in view. If one person makes iced drinks and another makes hot lattes, compare coffee and milk needs separately. The most complex occasional order need not determine every purchase. You may prefer a simpler everyday route, provided the shared needs are clear and the required kit is complete.
A cup label is not the whole drink recipe
One cup and two cups on a filter or control describe part of the machine's route. They do not name the final mug you must fill. Read the filter and delivery directions together. You still decide which drink is being served after that coffee stage. A latte can include added milk, while an Americano can include added water.
This matters if your first serving vessel is large. Do not use its size alone as a reason to keep water flowing through the same coffee bed. Choose the supported coffee route first, then plan the rest of the drink. The cup beneath the spouts can be a brewing vessel rather than the final glass, where that suits the permitted setup and safe handling.
It also makes the single and double filter choice easier to understand. Use the right filter for the stated coffee preparation, rather than choose by how large the mug looks. A button name does not weigh the grounds for you. Keeping these roles clear helps a new owner learn the controls without mistaking every quantity label for a complete recipe.
Best espresso machine for beginners: check the supplied kit
Check the full model code first. The standard Bambino and its Plus sibling serve different milk tasks. The Maestro Plus is its own Dedica model. A large family name can hide the distinction that mattered most when you made the shortlist. Keep the exact code beside the planned coffee and milk route while reading the kit contents.
Next check which listed parts serve that route. A jug matters for hot milk, while a grinder matters for whole beans. A spare filter for another format can be useful later without being needed for the first drink. This helps you judge the kit by what it lets you do, rather than how many small parts appear in the box.
Last, review the place where you will learn. Leave the controls visible, the filling area stable and the care route clear. If the setup requires moving several items before each cup, solve that layout now. The first machine should give you a routine you can practice with the equipment and space you actually have.
Frequently asked questions
Are semi-automatic espresso machines good?
They can suit a beginner who wants to prepare coffee in a portafilter while choosing how much help to get with the milk. The tasks differ across these models. The Stilosa leaves coffee stopping with you at a dial. The Maestro Plus offers automatic milk settings. Choose the work you want to learn rather than expecting a complete bean-to-cup routine.
Is DeLonghi or Breville better?
Choose by the exact model and the task. The standard Bambino leaves jug and wand positioning with you. The Maestro Plus offers automatic steaming with milk heat and texture choices. The Stilosa uses a manual coffee-stop selector. A brand name alone does not tell you which of those routines will be easier for your household.
What kind of coffee to buy for an espresso machine?
Match the coffee to the machine's supported basket. The Bambino's US book directs fresh grounds to single-wall baskets and pre-ground coffee to dual-wall baskets. Whole beans need a suitable separate grinder before either brewing step. Check the exact model's directions rather than applying that basket advice to every machine with a similar-looking handle.
Does the Stilosa stop the coffee for me?
Its documented routine leaves the stop with you at the selector. Choose it if you want that direct action and will stay with the cup. A saved shot stop on a different small machine does not transfer to the Stilosa. Decide whether you want that control before choosing it as a first machine.
Do I need a replacement portafilter to begin?
Start with the supplied handle and the correct stock filters. A replacement needs a specific reason and a complete fit check. Nominal diameter does not establish the locking shape or room for a deeper basket. Learn what the original parts do before choosing a different interface for a future coffee route.
Is an automatic rinse enough for the Maestro Plus wand?
Its book calls for wiping milk residue and using the OFF-position rinse. Follow both actions because rinsing does not establish that the outside is clean. Automatic milk settings help during steaming while care after use remains a separate task. Make that care part of learning the first milk drink, whichever supported steaming mode you choose.
Verdict
The best espresso machine for beginners should support the routine you want to learn. Choose the Bambino for its basket options and manual milk kit. The Stilosa suits direct control of the coffee stop. Pick the Maestro Plus for help with milk settings.
Return to our espresso picks within the budget to compare the full setup. Start with one supported route and learn its care before adding tools.